
Get ready for Sunfest! We challenge our creative Trovians to design cakes for the Summer event \o/
Hello, dear Trovians!
Every year we celebrate an anniversary of Trove - Sunfest! This year the Trove team would like to let the players join in on the celebration with the perfect dessert, cake!
If you have never tried creating anything for Trove - this is a good time to start! The instructions below provide step-by-step guidance and our community members are happy to help you out with any questions! Ask here in comments or on Discord in #creations channel > https://discord.com/invite/trovesaurus
After the contest ends, the Trove Developers Team will pick some player made Cakes and add them to Trove in a future update!
Task Ylva
- Using the provided Cake Dungeon template (.qb or .vox) design a cake!
Downloand .qb file > https://trovesaurus.com/files/dungeon_cake_template.qb
Downloand .vox file if you are using MagicaVoxel > https://trovesaurus.com/files/dungeon_cake_template.vox - Export your edited file as .qb, convert it to a .blueprint, name it
cake_cakename[YourName]and upload it to Trove Creations as 1* Dungeon.
https://trovesaurus.com/creations -> My Creations tab -> Create 1* Dungeon button in the middle - > Cake Contest - Your Cake Name Here.
Duration Ylva
This contest will run from 1st of March 2023 to 31st of March 2023!
No entries will be considered for the contest past Trove day reset of 1 st of April 2023!
Contest results will be announced between 1st and 7th of April 2023!
Rewards Ylva
A Cake creation of sufficient effort uploaded between 1st and 31st March 2023 will be rewarded with 1x Trovesaurus Reward Token.
Additional +1 Trovesaurus Reward Token will be granted for every Approved Cake, up to 5 cakes and so 5 tokens total!
You can check all the possible rewards to be redeemed for tokens over here > https://trovesaurus.com/rewards
Every Approved Cake will be considered by the Trove Team for being added to the game. A creator will receive 500 ![]() Credits from the Developer team for every Cake that gets added.
Credits from the Developer team for every Cake that gets added.
Rules Ylva
1) Uploads
One person can submit up to 5 different Cake designs for this contest.
Submitted Cakes will be checked by our Trovesaurus Creations team, they will verify that Cakes are following all the contest rules and provide other assistance if needed. If everything is in order – a Cake will be marked as Approved and so be considered as a valid entry for the contest.
Each Cake must be uploaded as a separate creation, and a follow-ups can only be submitted after a previous one has been checked by Creations Team. Only use 1* dungeon upload option for this contest. Keep the count in the name on your cake, even if you are not planning to upload more than one – Cake Contest - MyCake - 1/5, MyCake - 2/5 and so on.
2) Appearance
Cake designs must be family-friendly. They must not contain any text or non-Trove symbolics. They must not be direct representations of memes or other intellectual property. For example, do not upload the Minecraft cake or the cake from Portal or the Sims birthday cake.
A Cake has to look like a Cake, we have a lot of dungeons in Trove and these new Cakes really do need to be easily recognizable as Cakes.
Try using bright and saturated colors to make Cakes feel like they belong in colorful world of Trove. Avoid using automated coloring such as Gradient or Noise, hand-painted things usually look and work much better.
Only Specular Material Map is allowed to be used. If you do not know what this means - check out our Detailed Instructions step 3.1.

3) Shape and Structure
You must not change the dimensions of the provided dungeon_cake_template! The provided model has a Matrix size of 35x 35z and 45y, these are the maximum dimensions that can be used.

On the provided template, the Green layer can be modified as you wish, but please do keep all the additions within 35x 35z and 45y. The Cake must keep its cylindrical shape with slice cut out!
Do not turn it into a cube, it will not fit on a plate!
The Brown layer of the template can only be colored. Do not change its shape, remove or add anything on the inside!
Do not obstruct or change the location of an Entrance!
The Cake dungeons consist of a plate, two biscuit-rooms and an outside Cake 'case'. For all rooms, plates and cakes to work together it is very importnant to follow all the Shape and Structure rules!

Detailed Instructions Ylva
Instructions below provide a step-by-step guide on how to participate. If you are new to the whole voxel-model-making-process, don't be scared, it is much easier than it seems!
If you have already made some Mods or Creations for Trove then you are likely familiar with everything up to step 4, but please do read through steps 5, 6 and 7 :)
If you have any questions about anything related to this contest - feel free to ask in #creations channel in our Trovesaurus Discord server.
Feel free to leave a message here in comments, or reach out through direct messages on Trovesaurus to ![]() Ylva!
Ylva!
To edit the provided Dungeon Cake Template you need to download and install a Voxel Editor. Such programs are used to edit models made from tiny 3d cubes - voxels. There are plenty of various voxel editing applications but we suggest you try MagicaVoxel. It is free, easy to use and has all imaginable tools for voxel editing. It is used by many people in our Trove Modding community and the YouTube has a lot of guides for it.
QB file, works in any voxel editor > https://trovesaurus.com/files/dungeon_cake_template.qb
MagicaVoxel VOX file to make sure it keeps the colors > https://trovesaurus.com/files/dungeon_cake_template.vox
If you already have experience with voxels - please feel free to continue using an editor that you are familiar with.
You can download MagicaVoxel from here >> https://ephtracy.github.io/

Dont like MagicaVoxel? Check out our full list of suggested Voxel Editors over here >> https://trovesaurus.com/page=3749/how-to-get-started-with-trove-creations#step-1-acquire-voxel-editor
Once you have your editor ready, download our dungeon_cake_template.qb and open it.
This step might be slightly different for various Voxel Editors, but usually you can just dragging a .qb file onto the editor. If that does not, you might need to look for any sort of Open or Import button.
For MagicaVoxel, download the dungeon_cake_template.vox, find an Open button in the top right corner and navigate to the .vox file you just downloaded.
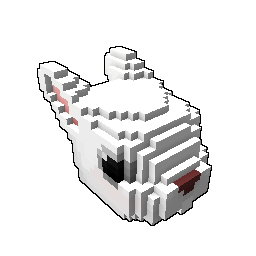
You should see something like this on your screen if you have successfully opened the template.

Use your creativity to design a delicious cake!
Remember, you can add and remove blocks to and from Green layer, but you can only recolor Brown layer – this part will be covering the rooms of the dungeon and changing it can harm the way the dungeon works.
For my Cake example i have added a bit of frosting on top, colored the sides and made small dents in them.

While working on your contest entry you might want to save your progress a few times. It does not matter in which folder you keep your work-in-progress files, but if you have doubts - create a new folder on your desktop named My Trove Creations and keep all your .qb, .vox or other files in it.

Your creation needs a new name! It is no longer just a template, so we need to make sure it has something of its own.
I named my Cake example cake_pink[Ylva], where
- cake - is a part that tells what this file is
- pink - is the name i gave this design
- [Ylva] - is my Trove in-game nickanme and also my nickanme on Trovesaurus – make sure that YOUR name on both of these is the same, else we will not be able to properly distribute rewards!

Saving your progress can result in various file fortmats, for example, saving your MagicaVoxel project will make a .vox file. Qubicle would save the work-in-progress files as .qbcl and so on.
I save the Cake i made and get a cake_pink[Ylva].vox:

The Trove game however uses .blueprint files which are made only from .qb files – luckily, every Voxel Editor allows for the files to be exported as .qb.
To export a .qb file from MagicaVoxel you need to find an Export button in the bottom right corner and click on QB. That will pop up a window where you can choose where to save your .qb file.
Other voxel editors have similar process, but location of an Export button can vary.

NOTE: when exporting from MagicaVoxel as .qb, please make sure to Flip your model by Y, else the entrance will be on the wrong side!
I am exporting my Cake to My Trove Creations folder, so for me the new file looks like this:

Once you are done with main design and color of your Cake, you can apply Specular Material Mapping to it. This is a sort of extra texture that allows blocks to shine like metal, appear reflective or wet and so on. This step is fully optional, Cakes without Material Mapping can look really good too!
Please do not use Type (glowing) and Alpha (glass transparency) maps, only solid blocks are allowed on cakes!
To get the Material Mapping going you first need to make sure that you have SAVED your work as a separate file!
Let's take a .vox (or .qb if you are not using MagicaVoxel) from the Step 3 – for me it is the cake_pink[Ylva].vox located in My Trove Creations folder.
Copy and pase it in the SAME folder where your other files are.
Rename it and add an _s in the end – my copy is now named cake_pink[Ylva]_s.vox
That _s indicates that this is a S(pecular) map.
Open your Specular .vox (or .qb) file in the voxel editor and apply some of the following colors to the model. Please be sure to only use exact colors from the list below!
RGB 128.0.0 - Hex 800000 - Rough - this color is applied to any block that you want to keep a DEFAULT appearance, or in other words - if a block is not using any of the colors below - it must be using this color.
RGB 0.128.0 - Hex 008000 - Metal - this color is applied to all blocks that you want to have a metal shine
RGB 128.0.128 - Hex 800080 - Waxy - this color is applied to all blocks that you want to have a soft glow
RGB 0.0.128 - Hex 000080 - Water - this color is applied to all blocks that you want to make look wet, but they will not turn into liquid!
RGB 128.128.0 - Hex 808000 - Iridescent - this color is applied to all blocks that you want to make look shiny like a pearl
For example, i want the frosting on my cake to look a little wet, and i want the biscuits to feel warmer. To achieve that i use a Flood-fill (Region Replace in MagicaVoxel) of 000080 Hex color on pink areas and 800080 Hex color on light brown areas.

Save (or Export) your Material Map as a separate .qb file, just like we did for base color model . You should end up with something like this in your folder:

You should have one (or two!) .qb files in your folder, one with your BASE color and an optional second file with SPECULAR mapping.
We need to convert those two QB files into a BLUEPRINT - file format used by Trove.
To do that, find your Trove/Live folder - a place where Trove game client is installed on your machine.
If you are playing through Glyph - click on a Yellow Gear button next to PLAY on your Trove and go to Game settings. That will show a full path to your installation Folder. Clicking on the Browse button will open Trove\Live folder right away.

If you are playing through Steam - right click your Trove in the library list on the left and go to Manage > Browse Local Files. That will open your 'Steam\steamapps\common\Trove' folder, but you need to go a bit deeper to Steam\steamapps\common\Trove\Games\Trove\Live

Once you have found your Trove\Live folder, look for a file named devtool_dungeon_QB_to_blueprint.bat . There are a few other .bat files in that folder so please be very careful to only use this one!
While having Trove Live folder open, open your My Trove Creations folder (or any other folder where you saved your progress) in a window right next to it. Drag your BASE COLOR .qb onto the .BAT. You will see a black console window popup for a few seconds, then it will go away and in your My Trove Creations folder you should be able to see a freshly baked blueprint of your Cake.

If you only had one Cake .qb - you will have one blueprint. If you had your main .qb and the Specular map QB - you will still have only ONE blueprint! All the material maps get baked into the blueprint, if they were in the same folder as main .qb when it was converted to .blueprint.
My two qb files cake_pink[Ylva].qb and cake_pink[Ylva]_s.qb have now turned into one cake_pink[Ylva].blueprint
Lets check out how the blueprint you made looks in game! That will give you a good understanding of how the design will appear from a player perspective.
If you applied any Material Maps - you will be able to see them applied to your model in Metaforge.
Log in to the game, type /mf in chat and click Confirm - that will send your character straight to Metaforge editor, voxel editor in-built in Trove. Do not worry, if you close your game and launch it again - your character will be right where you left them before entering the Metaforge.
For this step it helps to have Trove running in Windowed Mode. With Trove running, open your 'My Trove Creations' folder and drag your Cake blueprint straight into the game window. It should load right away.

In Metaforge you can use F9 for flight, F10 for free camera and F7 to hide the UI. Pressing the same buttons again disables the effect.
If everything looks just like you wanted - take a few screenshots, you will need them in next step!
You can use F12 to take screenshots, or use any other method that you are familiar with.
By now you should have your .blueprint and a few screenshots to go with it. It's time to upload your creation!
Please make sure that you are using the same Nickname on the website as you do in game! If you do not have the same name, we will not be able to properly distribute rewards! Have troubles changing your nickname? Contact ![]() Etaew!
Etaew!
To upload your Cake, go to https://trovesaurus.com/creations , click on My Creations and select the Middle Option - Dungeon 1* - Create. That should take you to the upload form.
There are a few fields that you need to fill and an option to upload a file and a screenshot.
Biome field does not matter for this contest, but it is always nice to have one, especially if you believe that your Cake would look better in some biomes.
For Creation name please use the pattern of 'Cake Contest – Name of your Cake here – Number of your Cake uploads X/5'.
For this contest you can upload a maximum of 5 different Cakes, and since this one is your first upload for this contest, please add a 1/5 numeration. If you were to upload one more cakes after that - use 2/5 and so on.
Drag and drop your .blueprint and upload a screenshot. You can add more screenshots later if you wish.
Make sure to keep the name of your blueprint as it was - cake_pink[Ylva].blueprint in my case.
Lastly, if you want to, you could add a description, a baking recipe or any other information that you wish to share.
That's all you need for a Creation upload, so click on that Submit button!
After entering all the required information my form looks like this. If you need to zoom in - right click image and choose to Open Image in a new Tab.

The previous steps should have resulted with you having a Cake creation marked as Active. Everyone can see Active creations here and we encourage users to give feedback to each other!
Every Cake upload for the contest needs to be checked by Creations Moderators to verify that it follows all the rules and would work fine if it gets Accepted for the game.
To get a Creations Moderator to check your Cake - click on the green Submit Creation For Review button on the right navigation panel.
Please be sure that the Creation you are sending for Review has your Cake bluerpint, at least one screenshot of it and follows the name requirements!

You can view my EXAMPLE cake creations sitting ready for review over here > https://trovesaurus.com/creation=556 .
Final Notes Ylva
If you have followed the steps above you should have a Cake Contest entry waiting for Creations Moderators to review it. We will go through Cakes marked as Needs Review a few times every week and Approve ones that follow all the rules and look good.
If you got your Cake Approved but feel inspired to create more – follow the same steps again! One user can have up to 5 Approved Cakes in this contest.
After the contest ends (31st March) each participant that had at least one Cake design of sufficient quality with Active status will receive 1x Reward Token.
Additionally for each Approved cake you will receive 1x Reward Token (up to a maximum of 5).
No Cakes will be reviewed or accepted after the contest ends! Make sure to upload your designs before the end of March!
After the end of the Cake Contest, between 31st of March and 7th of April, Trove Developers will check all Approved Cakes and pick ones they want to add to the game.
Every Accepted Cake will be paid with 500 ![]() Credits to an in-game account of the same Username.
Credits to an in-game account of the same Username.
We are looking forward to seeing what designs you can come up with!


You must be logged in to add a comment.